Brake Project
For this project we had to use the Mill to cut out a brake. We were given sheets that have measurements to use to design the brakes in Inventor.
First Step
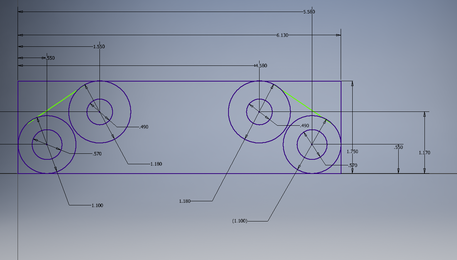
The first step was to design the brake in Inventor using the measurement sheet Mrs. Proctor gave us. To start the design I began with a rectangle because it made things much easier.

Once I completed putting in the measurements I was able to extrude the design.
Transport to Fusion 360
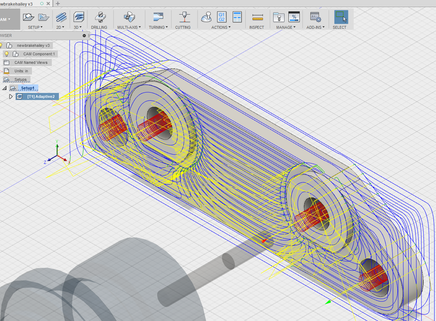
This is my brake after I transferred it into fusion 360 and put in all the information needed to insure that my brake runs successfully. Also to make sure that I have the right toolpath.
Cutting Out the Design
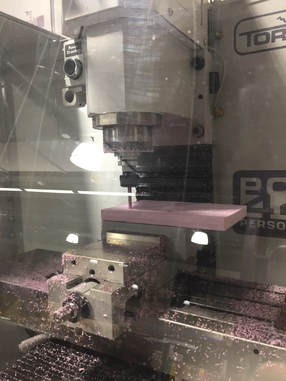
This is my brake being cut out in the Mill.
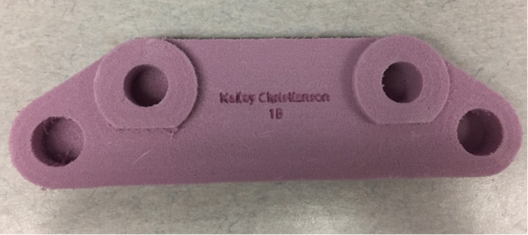
Finished Product
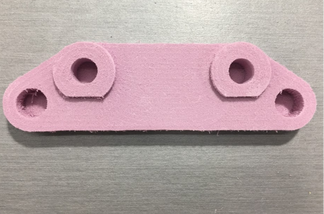
This is my brake right after I got it out of the mill.
After my brake finished in the Mill, I had to use the laser to engrave my name into my brake. Down below is my finished product of my brake.
Summary
From this project I have learned how to work with Fusion 360 and with the Mill. I am still not perfect on either, but I defiantly have a better understanding on both. I can also say that it was a cool experience to work with this new technology, and be able to create something else with it if I chose to do so.
